FoodSaver GameSaver Deluxe Vacuum Sealing Kit- Review
The first time I used vacuum sealers, I just fell in love with them. Like most people, I tend to think that it’s better to have more than enough food than to not have enough food.
That’s great when we have surprise guests at home, or if my family has a great appetite. But more often than not, I tend to end up with lots of leftovers.
There was a time when I did what most people do and just used the refrigerator and freezer to preserve the leftovers. But even then I realized that this wasn’t the ideal solution.
The food turned bad rather quickly. When I used the freezer for meat, it turned ugly and its taste became terrible. But using vacuum sealers fixed all these problems.
Of course, it matters a lot what sealer you use, and that’s where FoodSaver vacuum sealer comes in. The food saver is a terrific example of how a vacuum sealer can preserve your food items for a very long time, without damaging its taste.
Things Need To Consider
Making a Bag
The GameSaver Deluxe comes with a roll of FoodSaver bags, which works best for this model. Here’s how you make a bag for your food:
- Open the lid and then place a role into the storage compartment.
- Pull enough bag material to contain the food, and then add another 3 inches. Then you can close the lid.
- Just press down lightly on the lid, and slide the bag cutter from one end of the sliding channel to another to cut the bag material. Then return the roll back into the compartment.
- Now place one end of the bag material over the sealing strip (and not over the rubber gasket). Then close the lid again.
- Set the seal control switch to “Vacuum and Seal”.
- Use both hands to firmly press down on the lid until the motor starts. Release your hands about 4 seconds, although the motor will still run.
- Once the motor stops running and the indicator light goes off, you can open the lid and remove your new bag.
Vacuum Packaging
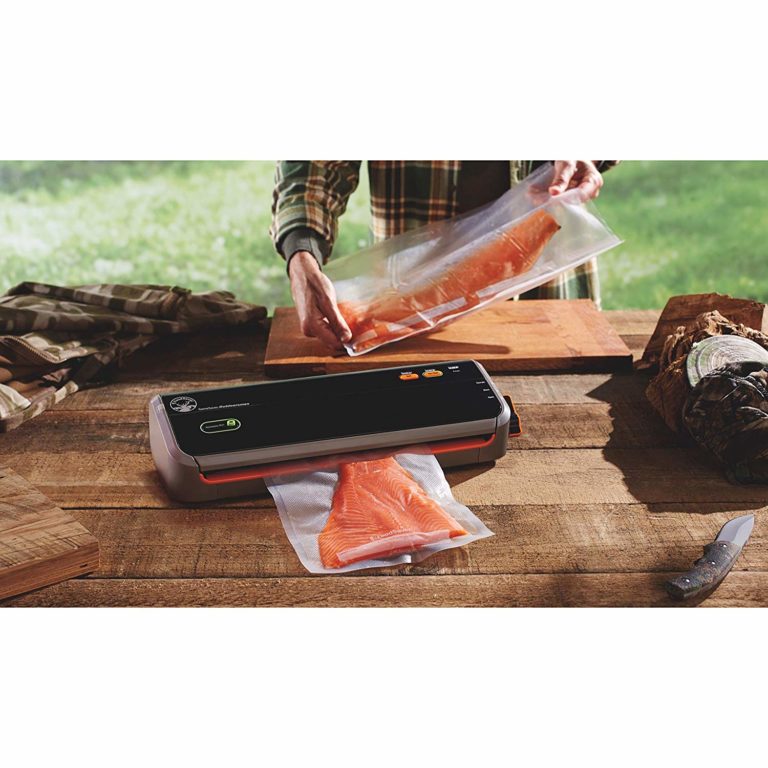
Now that you have your bag, you can now use it for the vacuum sealing process.
- Put the foodstuff in the bag, making user that you have least 3 inches between the content in the bag and the end of the bag.
- Open the FoodSaver lid and put the open end of the bag into the vacuum channel. Close the lid afterward.
- Turn the seal control switch to the appropriate setting. Normally, this is the Vacuum and Seal set. But if you’re sealing in juicy of moist food, you have to use the Vacuum and Extended Seal set.
- Press down firmly on the lid with both hands, and hold that until the motor runs for about 4 seconds or so. You can then let go, but the motor will continue to run a little afterward.
- Shortly afterward, the motor will turn off and the indicator light will blink off too. That means it is okay to open the lid and remove the bag. Take out the bag and then place it in the fridge or in the freezer.
Using a Canister or Jar
You’re not required to use just the bags to seal in your food. You can use a jar or a canister. Just make sure you keep the following guidelines in mind.
- You will need to get the proper attachments for the size of your jar. Unfortunately, there aren’t any one-size-fits-all attachments. But at least they’re fairly cheap, and you can get each on for less than $10 or so.
- There should be at least an inch of space between the rim and the jar contents.
- Clean the rim of the jar or canister thoroughly to ensure a tight seal. Any dirt on the rim can mess with the tightness of the seal.
The Drip Tray
Every now and then, you may get some moisture into the vacuum channel during the sealing process. This can be a messy problem, so for that, you have the drip tray.
- It’s removable, so you can take it out and clean it.
- It is dishwasher-safe, and you can use the top rack of the dishwasher.
- It’s made from an antibacterial ingredient that’s approved by the FDA.
- You can still use the vacuum sealer without using the tray.
Pros
- It’s very affordable. The price is excellent, and you get a lot of value for your money. Other models with similar features tend to be more expensive.
- The seal is fantastic. It has a lot of vacuum power, so the seal is terrific.
- It’s very easy to use. It’s all a matter of pushing the right buttons, but these are very intuitive.
- It’s very quick. Once you pop in the bag for the sealer, the process takes only a few seconds before it stops automatically.
- It’s very durable. You can seal bags continuously for up to an hour before you need to rest it. But this can last you for several years.
Cons
- It’s huge. Now we all have limited space on our countertops, so we tend to be picky in what we leave there. But I’m guessing that for many folks, this is going to be stored away whenever it’s not in use. That’s because it’s really wide, so it takes a lot of space on your kitchen counter.
- The jar seal attachments are extra. Just make sure you get the right size attachment for your jars.
- It’s a bit nitpicky. You need to make sure that the jar lids are clean. If it’s not, you won’t get a good seal on the jar. Also, it won’t work for some types of vacuum bags.
Features
- Easy to use one-touch controls. You can set the speed to Normal or Fast. You can set it to seal Dry or Moist food. You can also choose between the default Auto Vacuum and Seal, Manual Seal with no vacuuming, our Canister seal when you use it to seal your jars.
- Accessory port. You can buy optional attachments and use this port to seal in various sizes of jars.
- Automatic stop. For other vacuum sealers, you need to be careful and you have to monitor the process. That’s because the vacuum process can go on for too long and you end up with crushed food inside the bag. With this sealer, however, the process stops automatically.
- Manual stop. The automatic stop may not work at some point, but don’t worry. There’s still a Cancel button you can use to stop the process without sealing, and an Instant Seal button stops the vacuum process early but you still seal the bag.
- The manufacturer does have a lot of faith in its durability, don’t they?
Frequently Asked Questions (FAQs)
Q: How can you prevent liquid or moisture from getting into the vacuum channel?
There are several ways to go about this. One is to pre-freeze the raw meat and other moist food for an hour or two before you package it. Another way is to put a folded paper towel between the moist food and the end of the bag so that the paper towel can absorb the moisture. With this second option, you just need at last 3 inches between the end of the bag and the paper towel so the bag can still seal properly with the paper towel inside.
Q: How do you make sure that you remove the air from the bag?
First, you have to check that the end of the bag is inside the vacuum channel. Then you also have to make sure there aren’t any wrinkles in the bag along the sealing strip.
Q: Can you use Mylar potato chip bags?
Yes, by using the light seal. The instructions are explained in the manual.
Q: Can you seal in soups and sauces?
Yes, and for this the simplest way is to use a canister in the fridge. You can also use a bag, but you have to freeze it first and then you need to make sure you don’t overfill the bag.
Q: What about fine-grained or powdery foods?
You can also use a canister for these. You can also use bags if you want. Again, you need to check that you don’t overfill the bag. Then you can put a paper towel or a coffee filter inside. That should keep the grains from getting into the vacuum channel and clogging your pump.
Final Verdict
The FoodSaver GameSaver Deluxe Vacuum Sealing Kit is a highly regarded vacuum sealer that has received a ton of rave reviews online. But these are mostly from vacuum sealer users who already have some experience in using other sealers.
Comparatively speaking, the GameServer is very easy to use and offers a lot of value for money. The majority of the negative reviews, however, come from newbies who have unrealistic expectations of how this baby works.
Compared to the other models, the GameServer is undoubtedly superior. Using it is child’s play, it’s very effective, and it’s durable too. Basically, all you need to do is to follow the simple steps laid out in the manual, and you’ll be fine. It really does offer a very effective seal, and it works for lots of bags, canisters, and jars.
You can use it for many bags in succession, and it’ll give you plenty of years of service. If you have any problems understanding what to do, you can just go online and watch FoodSaver online videos so you can just follow the video demonstrations instead.
At this price range, you really do get your money’s worth. Unless you’re planning to use a vacuum sealer for some commercial purpose, you should really consider using this for your food preservation needs.

