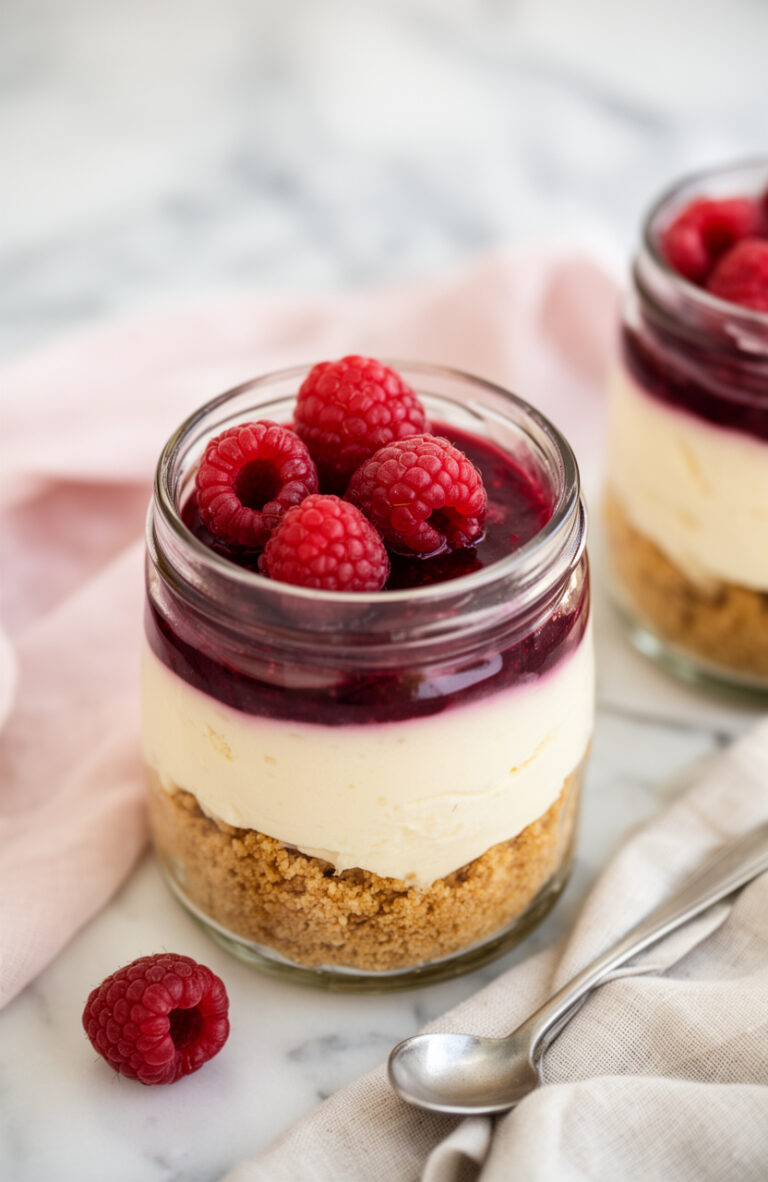
No-Bake Strawberry Cheesecake Cups Ready In 15 Minutes
My youngest asked for cheesecake on a Tuesday night and I had exactly 15 minutes before bath time, so these cups were born out of necessity, not inspiration.
They come together fast because everything is already cold and ready to layer. The hardest part is stopping yourself from eating the filling off the spoon before it hits the cup.
No-Bake Strawberry Cheesecake Cups Ready In 15 Minutes
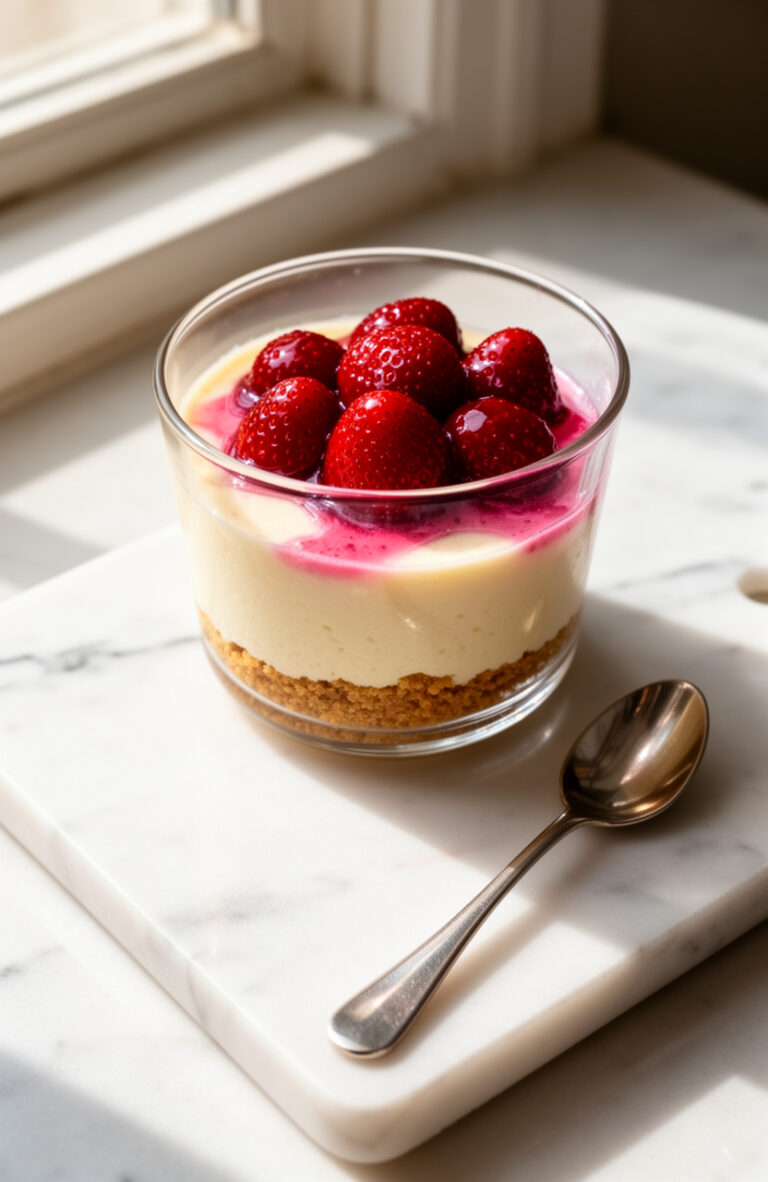
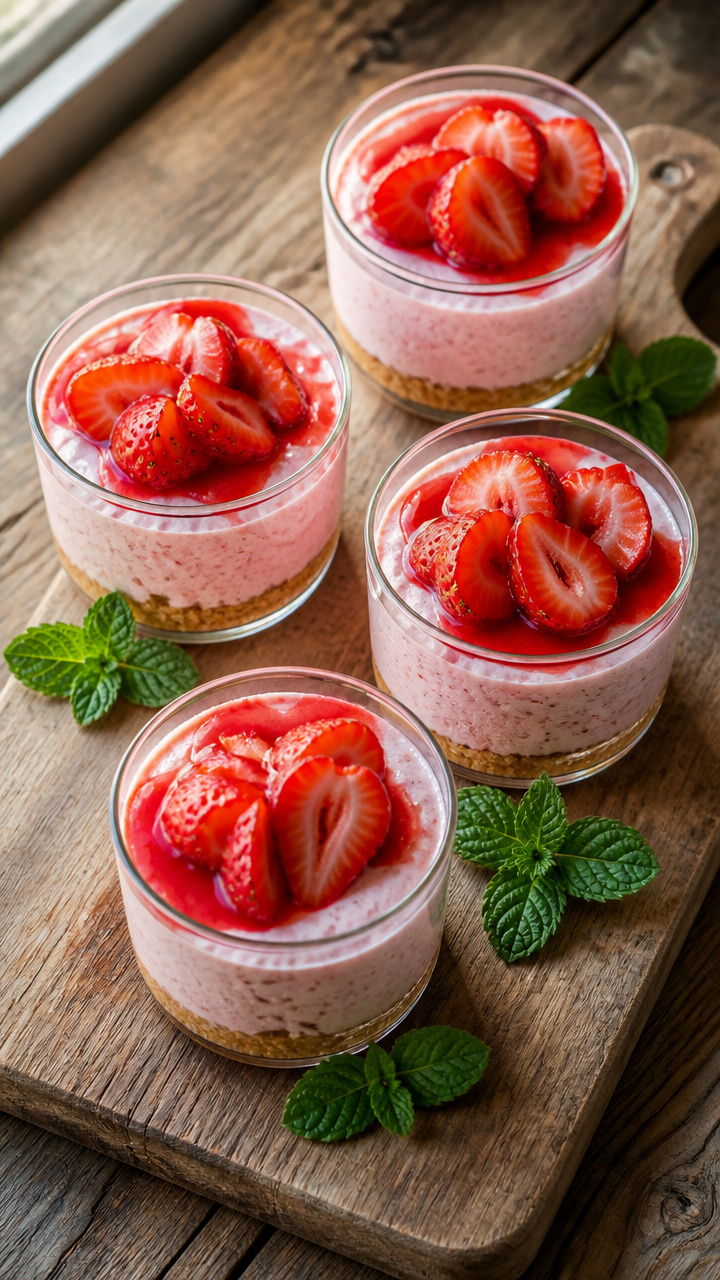
Creamy cheesecake filling layered with fresh strawberries in individual cups, no oven needed.
Ingredients
- 8 oz cream cheese , full fat, softened to room temperature
- 1/3 cup powdered sugar , sifted
- 1 tsp vanilla extract
- 1 cup heavy whipping cream , cold
- 1 cup graham cracker crumbs , about 8 full crackers crushed
- 3 tbsp unsalted butter , melted
- 1 tbsp granulated sugar , for crust mixture
- 1.5 cups fresh strawberries , hulled and diced small
- 1 tbsp granulated sugar , for macerating strawberries
- 1 tsp lemon juice , fresh
Instructions
Tips & Notes
- Cream cheese must be at room temperature or the filling will turn out lumpy no matter how long you beat it. Pull it out 45 minutes before you start.
- If you skip the chill time, the filling is still delicious but looser. Serve immediately and call it a parfait.
- Frozen strawberries work in a pinch. Thaw them first and drain the excess liquid so the crust does not get soggy.
- A zip-top bag and a rolling pin crushes the graham crackers in under 2 minutes with no food processor needed.
Nutrition per serving · estimated


Why Individual Cups Changed Everything for Me
Before I started making these in cups, I always fussed over a springform pan, worrying about clean slices and whether it set properly overnight. Cups removed all of that pressure.
Each person gets their own, portion size is built in, and kids think eating dessert from their own little cup is somehow more exciting than a slice from a shared pan. I have no explanation for it but I will take the win.
Getting the Crust Right Without Baking It
An unbaked graham cracker crust only holds together if the butter ratio is right and you press it firmly. Too loose and it crumbles the second you touch it. Too much butter and it turns greasy and dense at the bottom.
The 3 tablespoons of butter to 1 cup of crumbs ratio here hits the right balance. Press it down hard with the back of a spoon until the surface feels compact and does not shift when you tap the side of the cup.